Organize Your Scene with Custom Icons: Cinema 4D
A great way to keep your projects organized in Cinema 4D is not just to group objects into nulls, but to assign custom icons to them. When each null has a unique icon for cameras, lights, and other elements, the scene becomes clearer and easier to navigate.
Assign icons to null objects
Setting this up is simple:
- Create null objects for different groups: geometry, cameras, lights, etc.
- Go to the Maxon icons page
- Search for an icon that fits your needs and copy its
Integer Value (this is the icon’s ID) - Select the null and paste the
ID into theBasic → Icon field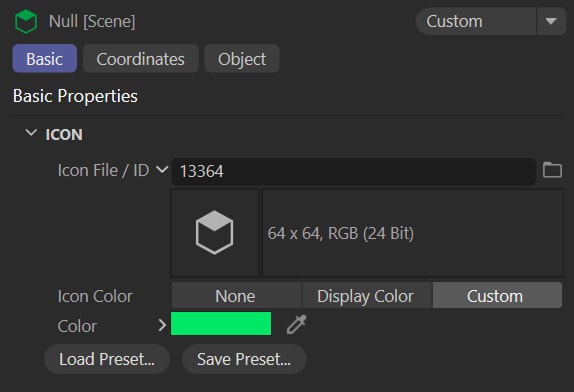
- Assign colors to the nulls to make the separation between groups clearer
- Repeat for all nulls to create a well-organized, visually clear scene
Bonus tip: save this setup as your default scene
Instead of starting with an empty project every time you open Cinema 4D, set up your scene once and save it as your default startup file:
- Arrange your scene with labeled nulls, assigned icons, and colors
- Go to
Window → Customization → Save as Default Scene
Now, every time you start a new project, you’ll have a clean, well-organized scene ready to go!